| Marks | |
|---|---|
|
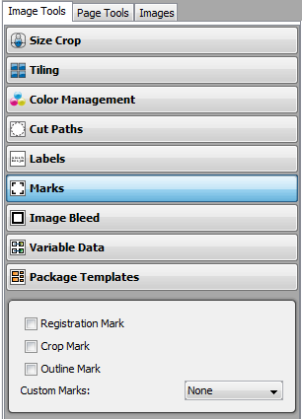
The Marks option in the Image Tools allows you to control the Marks used with your image. To use Marks, click the [Marks] option under the Image Tools, and select the type of Mark you want to use. [Marks] are place on your image automatically, and you can choose from the following types of Marks:
[Registration Mark] places a cross-hair at each corner of an image. These Marks are used when trimming an image. Using [Registration Marks] requires slightly more Media than other Marks because they are printed outside the image.
[Crop Mark] places right-angle marks on the corners of your image. These Marks are used when trimming an image.
[Outline Mark] places a 1-pixel wide border around your entire image. The Marks are used when trimming an image.
[Custom Marks] allows you to use your own marks. Use the drop-down box to select the mark you want to use. NOTE: Before you can use a [Custom Mark], you must first add it. See Image Options for more information.
|
Figure 1 |